A Painterly Inspiration
MATERIALS
- Images of flowers, either original or taken from the internet
- Self adhesive laminating sheets
- Thin cord
- Vase
- 1/16-inch hole punch
- Permanent marker
- Ruler
- Scissors
DIRECTIONS
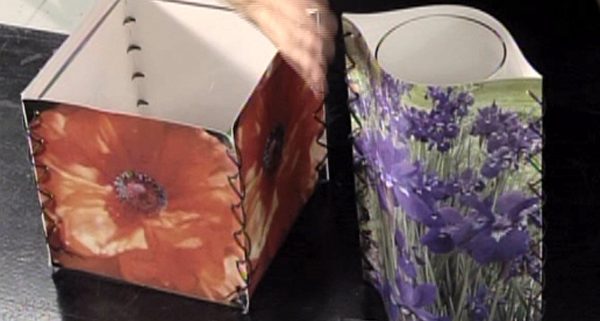
Measure your vase and print your images about ½-inch larger on either side than your vase. For a square vase, print four images and for a round vase, only two.
Laminate your photos with your self-adhesive laminating paper. Smooth out any air bubbles.
Cut your laminated images right up to the edge of the image.
Turn the image over and with a ruler, measure out 1-inch spaces and mark with a permanent marker.
Punch these marks with your hole punch. Repeat on the opposite side of the image.
In order to achieve the same exact spacing on the adjacent sides, line your punched photo up against the second, and through the punched holes, mark the dots. Repeat for all four sides of your vase slip cover.
To lace your slipcover, place your first two sides back to back. Cut a piece of cord that is about 3x the height of your image.
Make a knot in the cord and begin weaving from the bottom, leaving the knot on the outside. This will insure that the slipcover lays flat against the vase. Whip stitch the first two images together upwards and when you get to the top, thread the cord back through the holes making an “x” heading down. When you exit the last hole, make a knot. While lacing, leave a little slack in each stitch…pulling too tight will make it hard to fit the slipcover over your vase. Repeat this on all four sides.

