Direct Transfer Memories
MATERIALS
- Stack of black and white photocopies
- Clear packing tape
- Baking dish large enough to fit the photocopies in, filled with water
- Polymer acrylic medium
- Thin craft wood
- Pencil
- Hinged metal ring
- Scissors
- Hole puncher
- Foam brush
DIRECTIONS
Cover the black and white photocopies with the packing tape photo, overlapping the strips of tape as you go. Trim the excess tape.
Soak the paper in the water, rubbing the back of the paper until there is no more paper on the tape and the image has been transferred. Dry the tape photo.
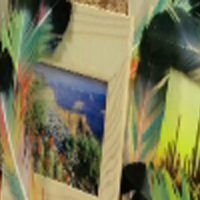
Measure and cut the wood to whatever size you want your album to be. Using a dry foam brush cover the wood in a generous and even layer of Polymer acrylic medium. Lay the photocopy face down onto the wood.
Beginning at the middle of the board, use your fingers to work out any excess medium or air bubbles. Allow to dry.
Punch a hole in the top corner of the wood and attack the metal ring; this is so that you can keep all your wood photographs together.