Entries by William Corbin

How to make your face look and feel great – 3 great DIY recipes

Sure, going out for dinner or drinks on a Friday night is lots of fun, but sometimes, all you really want to do is stay in and pamper yourself. The good news is you don’t have to spend a fortune on high-end beauty products to give your face a little bit of a lift. Chances […]


Print Recipe


3 DIY Ways to Make Your Face Look Brighter, Fresher, Younger

Green tea ice facial
Ice cube facials are some of the earliest spa treatments known to man. The cool cubes bring down swelling and tighten pores.
The addition of green tea gives your tired skin a little jolt of caffeine and a healthy dose of antioxidants, making your face look fresh and bright.
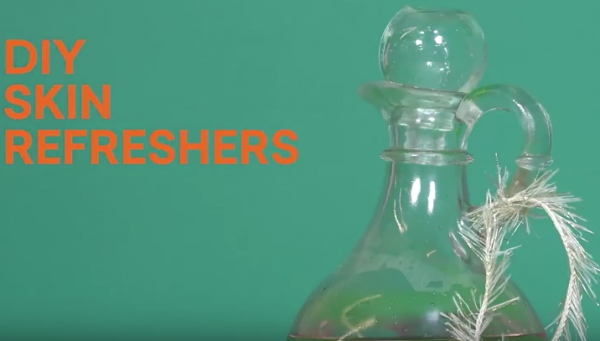
Skin and face refresher DIY by Katie Brown

Votes: 0
Rating: 0
You:
Rate this recipe!

Servings

Servings

Skin and face refresher DIY by Katie Brown

Votes: 0
Rating: 0
You:
Rate this recipe!


Instructions
  1. Make a pot of very strong (in fact, too strong to drink) hot green tea, and let it cool slightly.

  2. Pour it into an ice cube tray, filling the tray all the way to the top.

  3. Sprinkle some fresh dried green tea on top of each compartment.

  4. Freeze the tray of green tea ice cubes.

  5. When frozen, pop a cube out, hold it with the soft cloth for a grip (and to collect drips) and caress your entire face with the cube until it is melted.


Recipe Notes

DIY face-lift facial
Want to temporarily tighten your face? Look no further than egg whites. Packed with protein, whipped egg whites will leave your skin baby-soft and taut. The addition of lemon juice and honey, a natural antiseptic, will create a mixture that also acts as an astringent, which is perfect for oilier skin.
Materials:
1 egg white
1 tablespoon honey
2 tablespoons lemon juice
Tools:
Whisk
Instructions:
1. Mix the honey and lemon juice together.
2. Add the egg white and whisk into soft, white peaks.
3. Starting at the top of your forehead and working your way across your face, apply the mask with your fingertips in an upward stroking motion.
4. Sit and relax while it dries, about 10-15 minutes.
5. Rinse with warm water and pat dry.
DIY rose water
If it was good enough for Cleopatra, it’s good enough for us. Used every day by this beauty who was renowned for her flawless skin, rose water is a natural astringent and an antibacterial, and it’s packed full of vitamin C, which heals and smooths the skin.
Materials:
Large pot with domed lid
Heat-resistant glass or stainless-steel bowl (small enough to fit inside the pot)
Smaller bowl to set larger bowl on top of, or a brick.
Ice
Distilled water
2-3 quarts fresh rose petals
Instructions:
1. Place the smaller bowl upside down in the center of the pot. Alternatively, you could use a brick.
2. Place the petals inside the pot, all around the inverted bowl, and pour in enough distilled water to cover them.
3. Set the larger bowl on top of the inverted bowl, in the center of the pot, with the rim higher than the water by a few inches.
4. Cover the pot with the lid flipped upside down, and bring the rose petals to a boil. Once the water is boiling, fill the top of the lid (still flipped so it’s like a big bowl too) with ice cubes.
5. Reduce the heat and simmer for 2 hours.
When the heat hits the cold lid, it causes condensation, which then drips into the collector bowl in the pot. The result is pure rose water.
6. Add more ice as needed. The yield should be between one pint and one quart of fragrant rose water.
6. Store the rose water in a glass bottle with a spray top or tight-fitting lid.
Hint: If you didn’t use red roses, you can add a drop of beet juice to give it a pink glow.

Keep it simple and learn how to cook, garden, and decorate your home with Katie Brown.


Share this Recipe

How to make a rope wreath DIY

A fantastic rope wreath DIY that will make your door the envy of all. Print Recipe Rope wreath DIY rope and copper to DIY a wreath for your door Votes: 0 Rating: 0 You: Rate this recipe! Prep Time 15 minutes Servings front door MetricUS Imperial Ingredients 25 feet of Natural Rope12 gauge copper wireFeathersFake […]


Print Recipe


Rope wreath DIY

rope and copper to DIY a wreath for your door

Votes: 0
Rating: 0
You:
Rate this recipe!

Prep Time 15 minutes

Servings
front door

Prep Time 15 minutes

Servings
front door

Votes: 0
Rating: 0
You:
Rate this recipe!


Instructions
  1. Create a circle with the rope to your desired size. Remember that the shape of the circle you create will be the size of your wreath.

  2. Create about 3 or 4 loose circles with the rope.

  3. After you have a few loose circles, take the extra rope and tie a knot around the layers of loose rope.

  4. Create a few more loose circles of rope.

  5. Take the extra rope and create another knot. Now all of your rope should be secured! If you have extra rope, repeat steps 4 and 5.

  6. To add structure to your wreath, take the copper wire and wrap it around the rope in a few different locations. To do this simply cut about 8 inches of copper wire, wrap it around the rope, twist the copper together and cut the extra wire with wire clippers.

  7. Now it is time to create a bouquet to add some festive spice to the rope!

  8. Pair a few feathers with fake flowers of your choice. Remember to consider height and color—incorporating different feather heights and adding a small pop of color will really brighten your wreath!

  9. Once you have your bouquet arranged, use copper wire to secure the bouquet.

  10. Simply put the bouquet through one of the knots you have tied and voila, you have a very unique fall wreath!


Share this Recipe

How to make a Pumpkin Pie cocktail recipe

Pumpkin Pie cocktail recipe. So good and perfect for fall. Print Recipe Pumpkin Pie Cocktail Recipe If you’re a fan of the White Russian, a creamy, dreamy cocktail made with Kahlua, vodka and milk, you’ll like this pumpkin pie take on it! Votes: 0 Rating: 0 You: Rate this recipe! Course Beverage Cuisine American Prep […]


Print Recipe


Pumpkin Pie Cocktail Recipe

If you’re a fan of the White Russian, a creamy, dreamy cocktail made with Kahlua, vodka and milk, you’ll like this pumpkin pie take on it!

Pumpkin cocktail recipe by Katie Brown

Votes: 0
Rating: 0
You:
Rate this recipe!

Course Beverage
Cuisine American

Prep Time 5 minutes

Servings
people


Ingredients

Course Beverage
Cuisine American

Prep Time 5 minutes

Servings
people


Ingredients

Pumpkin cocktail recipe by Katie Brown

Votes: 0
Rating: 0
You:
Rate this recipe!


Instructions
  1. Combine all ingredients in a cocktails shaker with ice and shake well.

  2. Pour the cocktail into a tumbler, over ice.


Share this Recipe

How to make a silverware holder with gift wrap DIY

Why buy when you can DIY these awesome silverware holders using wrapping paper. Print Recipe Gift Wrap Silverware Holder These quick and easy silverware wraps are festive and fun, and really add a touch of excitement to your holiday table. After all, everyone loves a gift, and the gift of a beautiful home-cooked dinner is […]


Print Recipe


Gift Wrap Silverware Holder

These quick and easy silverware wraps are festive and fun, and really add a touch of excitement to your holiday table. After all, everyone loves a gift, and the gift of a beautiful home-cooked dinner is certainly something worth cheering about.

DIY silverware holder suing gift wrap by Katie Brown

Votes: 0
Rating: 0
You:
Rate this recipe!

Prep Time 10 minutes

Servings

Prep Time 10 minutes

Servings

DIY silverware holder suing gift wrap by Katie Brown

Votes: 0
Rating: 0
You:
Rate this recipe!


Instructions
  1. Take your knife, spoon and fork and wrap them in an ‘envelope’ of wrapping paper, so the opening is towards the back. Let the tips of the silverware peek out of the top.

  2. Make a pom pom of gift wrap, by cutting two large squares from it.

  3. Spray glue them together, so that both sides have the design.

  4. Cut long strips, about ¼-1/2” wide, and stack them together.

  5. Cut that pile of strips in half, and stack them together again.

  6. Depending of the thickness desired for your paper pom pom, take about ten strips piled together, and tie a ribbon around the center, letting the ribbon have a long. pretty tail.

  7. Pull each strip gently from the center upwards, to ‘fluff’ your pom pom.

  8. Place the ‘pom pom’ on top the the envelope on your plate.


Share this Recipe

How to DIY your shoes more comfortable

How to DIY Your Way to More Comfortable Shoes. No More Blisters! Print Recipe How to DIY your shoes more comfortable There’s nothing quite like a new pair of shoes! That is, until you spend half a day in them and find yourself slipping all over the place, aching and blistered. We’ve got three simple […]


Print Recipe


How to DIY your shoes more comfortable

There’s nothing quite like a new pair of shoes! That is, until you spend half a day in them and find yourself slipping all over the place, aching and blistered.
We’ve got three simple tricks to wear your shoes in quickly, so you’ll be fashionably comfortable in no time.

how to break in new shoes a DIY by Katie Brown

Votes: 0
Rating: 0
You:
Rate this recipe!

Servings

Servings

how to break in new shoes a DIY by Katie Brown

Votes: 0
Rating: 0
You:
Rate this recipe!


Instructions
  1. Pour about 1 ½ cups of water into a Ziploc baggie and seal it shut.

  2. Drop a corner of the baggie into the toe of your shoe, so that the toe is filled with water.

  3. Place the shoe with the baggie full of water into the freezer and leave it overnight.

  4. When the water is frozen, remove the baggie from the toe of the shoe and dry off the shoe if damp.

  5. Place the shoe on your foot while it’s still cold, and let the warmth of your foot shape the shoe as it dries.


Recipe Notes

Create no-slip soles
The sole of a new leather shoe can often be a slippery one. Here’s a way to get a grip, quickly.

Materials:
Sandpaper
Shoe
Instructions:
1. Scuff up the soles of your new shoes with sandpaper to create a rough surface that grips.
There’s no need to scuff too much. You simply want to texturize the smooth surface.

Stretch the shaft of your boot
The “one size fits all” theory never really seems to apply when it comes to tall leather boots. Fortunately, there’s a simple way to stretch them out.

Materials:
Rubbing alcohol
Cotton swabs
Instructions:
1. Swab the inside of your leather boot’s shaft with alcohol.
2. Put the boot on before the alcohol evaporates, so that the leather shaft molds to the width of your leg.

Keep it simple and learn how to cook, garden, and decorate your home with Katie Brown.


Share this Recipe
How to make a great feather bouquet DIY that last – forever

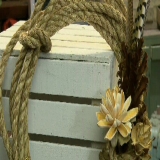
A great feather bouquet DIY that will last forever. Print Recipe DIY feather bouquet Votes: 0 Rating: 0 You: Rate this recipe! Servings MetricUS Imperial Ingredients FeathersGold spray paintFloral foamBurlapRibbonTools:ScissorsButter knife Servings MetricUS Imperial Ingredients FeathersGold spray paintFloral foamBurlapRibbonTools:ScissorsButter knife Votes: 0 Rating: 0 You: Rate this recipe! Instructions Mold and carve your oasis into […]


Print Recipe


DIY feather bouquet

DIY feather bouquet by Katie Brown

Votes: 0
Rating: 0
You:
Rate this recipe!

Servings

DIY feather bouquet by Katie Brown

Votes: 0
Rating: 0
You:
Rate this recipe!


Instructions
  1. Mold and carve your oasis into a rounded shape using a butter knife.

  2. Spray the tips of various sizes and colors of feathers with gold paint and allow them to dry.

  3. Arrange the feathers in the oasis. Think of it as arranging flowers in a vase.

  4. Cut the burlap to a size that will fit around the oasis and wrap the oasis in it.

  5. Tie the ribbon around your bouquet and give it to someone you care about.


Share this Recipe

How to make a great table top centerpiece using Apples and DIY

Katie Brown shows you Apples Are Flowers Too and perfect for a table top centerpiece. A DIY apple topiary for a teacher. Print Recipe How to make a great table top centerpiece using Apples and DIY If you’ve wanted to take a stab at a non-floral centerpiece, here’s a sweet starter project.  The fall colors […]


Print Recipe


How to make a great table top centerpiece using Apples and DIY

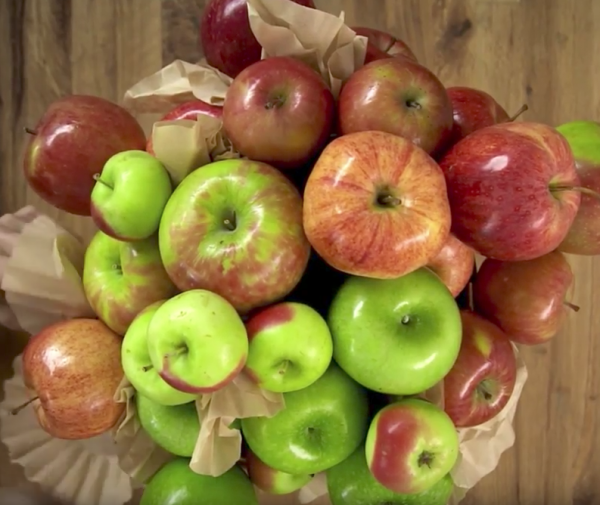
If you’ve wanted to take a stab at a non-floral centerpiece, here’s a sweet starter project.  The fall colors of these apples will give your home just as much pop as any arrangement.  They will definitely last longer.

DIY centerpiece using apples from Katie Brown

Votes: 0
Rating: 0
You:
Rate this recipe!

Prep Time 10 minutes

Servings
table top

Prep Time 10 minutes

Servings
table top

DIY centerpiece using apples from Katie Brown

Votes: 0
Rating: 0
You:
Rate this recipe!


Instructions
  1. Cut the flower foam to fit inside your pot or vessel.

  2. Poke the apples with the floral sticks.

  3. Arrange your apples “bouquet” and flourish with greens.


Share this Recipe

How to make your own bath products and save a ton with this Bath Tea DIY

Save a bunch of money and make your bath the a most luxurious one with this simple bath tea DIY. Print Recipe How to make your own bath products and save a ton with this Bath Tea DIY Bath products can be so expensive and filled with so many artificial, unnecessary ingredients. Why not make […]


Print Recipe


How to make your own bath products and save a ton with this Bath Tea DIY

Bath products can be so expensive and filled with so many artificial, unnecessary ingredients. Why not make your own bath products using everyday items? Make your own bath into a tea bath!

DIY bath tea from Katie Brown

Votes: 0
Rating: 0
You:
Rate this recipe!

Servings

Servings

DIY bath tea from Katie Brown

Votes: 0
Rating: 0
You:
Rate this recipe!


Instructions
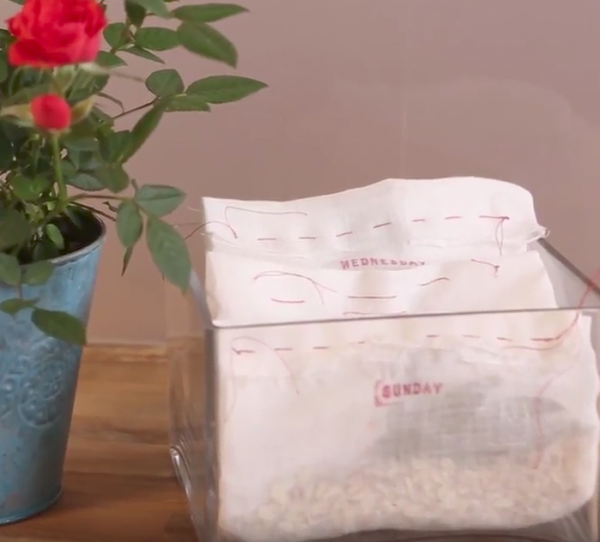
  1. Mix your herbs and tea ingredients in a dish, break them up and mash them to release aroma and essential oils.

  2. Cut a square pice of cheese cloth and pile your herbs inside.

  3. Fold it as if you are folding a shirt, leaving a final fold on the top. Stitch the top flap to bind the bag together.

  4. Stamp the bags with days of the week.


Share this Recipe

DIY a moss wreath and add a little spring to your front door

A Spring Wreath That’s Sure to Put a Little Bounce in Your Step Although it may not feel like it in some parts of the country, spring is on its way. There’s a change in the air and in some areas, the early buds of the season are beginning to pop their weary heads out […]


Print Recipe


A Spring Wreath That’s Sure to Put a Little Bounce in Your Step

They say first impressions are lasting impressions, so why not start with your front door and a unique take on the spring wreath?
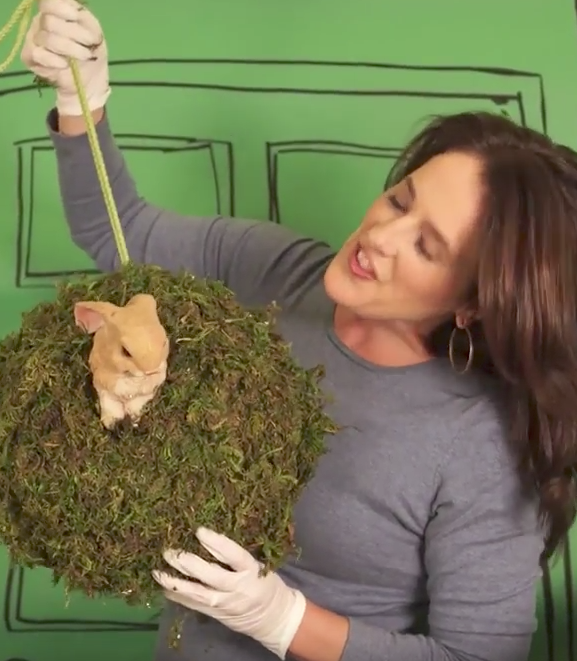
In this case, we suggest you skip the flowers (let’s face it, they may not survive the outdoors just yet), and opt for something a little sturdier like moss and a playful bunny rabbit.
You can pick up a styrofoam dome at any craft store for less than $5, and a trip to the variety store is sure to yield a plastic or plaster bunny for just a couple dollars more. Once you have your moss in hand, you’re about 10 minutes away from banishing winter! (From your front door, at least!)

Moss wreath DIY from Katie Brown

Votes: 0
Rating: 0
You:
Rate this recipe!

Servings

Moss wreath DIY from Katie Brown

Votes: 0
Rating: 0
You:
Rate this recipe!


Instructions
  1. Spray glue on to the outside of the styrofoam and begin patting on the moss until the half-dome is covered.

  2. Cut a hole where you want your bunny to peak out of his hole.

  3. Push your bunny through the hole from the inside to the outside, leaving as much of the body inside as you can and wedge it in place. Hot glue it to the edge of the hole for security.

  4. Poke a hole in the top of the styrofoam and thread a loop of cord through the hole. Knot off the cord on the inside of the dome to secure it.

  5. Cover any sides of the hole with more moss, so it really looks like the bunny is coming out of its hole in the ground.


Recipe Notes

Start with a small hole, you can always go bigger, but you can’t make it smaller once it’s cut.

Keep it simple and learn how to cook, garden, and decorate your home with Katie Brown.


Share this Recipe
Dutch Oven Potatoes recipe a comfort food side dish

Potatoes are always a welcome side dish and this dutch over potatoes recipe work every time. Print Recipe dutch oven potato recipe 1 stick butter • 1 Tbsp garlic, minced • 20 small white potatoes • 1 Tbsp parsley, chopped • 1 Tbsp dill, chopped • Salt & pepper, to taste Votes: 0 Rating: 0 […]


Print Recipe


dutch oven potato recipe

1 stick butter
• 1 Tbsp garlic, minced
• 20 small white potatoes
• 1 Tbsp parsley, chopped
• 1 Tbsp dill, chopped
• Salt & pepper, to taste

dutch oven potato recipe from katie brown

Votes: 0
Rating: 0
You:
Rate this recipe!

Course Side Dish
Cuisine American

Servings


Ingredients

Course Side Dish
Cuisine American

Servings


Ingredients

dutch oven potato recipe from katie brown

Votes: 0
Rating: 0
You:
Rate this recipe!


Instructions
  1. Melt the butter in a dutch oven.

  2. Toss in the garlic.

  3. Once heated, add the potatoes. Season with salt & pepper to taste. Toss the ingredients together.

  4. Cover the dutch oven, stirring occasionally.

  5. Allow the potatoes to heat until brown and soft.

  6. To finish, add the parsley and dill, and stir gently.


Share this Recipe