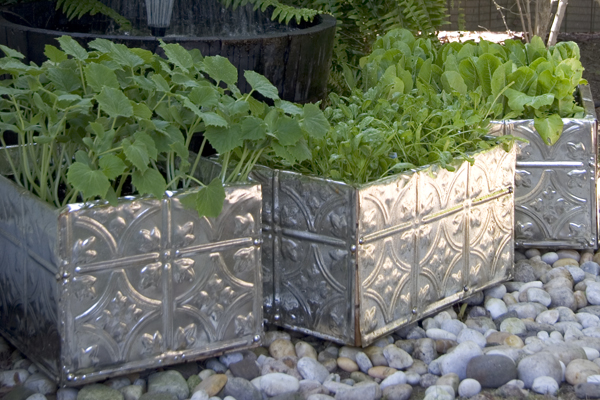
Tin Planters
MATERIALS
- Wood crates
- Tin ceiling tiles
- Heavy duty garbage bags
- Large upholstery tacks
- Protective gloves
- Strong tape
- Ticky tacky
- Hammer
- Tin snips
- Staple gun
DIRECTIONS
First you want to line your crate with a garbage bag. Puncture it with a few holes for drainage.
Wear protective gloves because once you cut the tin, you could encounter a sharp edge.
Measure your crate and cut your tin to the size of each side, plus 4 inches in one dimension. This is so that you can fold the tin over the edge of the crate.
To keep the tin in place, I have these decorative upholstery tacks that I’m going to use as nails. Just hammer them in along the bottom edge and up the sides. The tacks tend to slip on the tin, so you can use this gummy tack to hold them in place. You can hold the tin in place by tapeing it down around the edges for easy hammering.
Fold the tin into the planter and hammer it in about 2-4 places on the inside of the crate.
Work on two opposite sides first.
For the next two sides, you’ll need to cut a small triangle out of two adjacent corners so that it will fold down into the crate neatly.