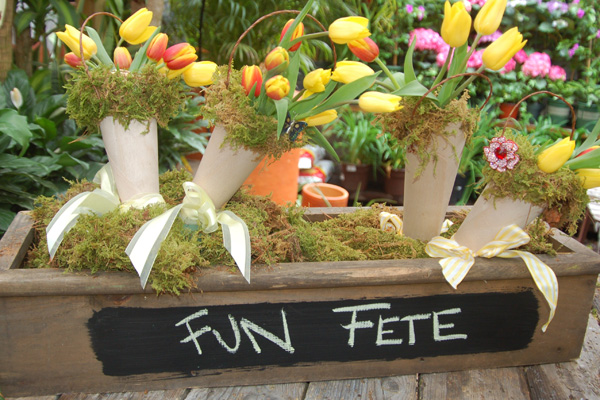
Centerpiece Made With Carry Away Cones
MATERIALS
- Birch plywood: 1/64 x 12 x 24-inch sheet
- Rubber bands
- Wired ribbon
- Floral wire with bark finish
- Oasis
- Moss
- Spray adhesive
- Flowers
- Brooch
- Scissors
- Ruler
- Awl
- Box cutter
DIRECTIONS
Roll two corners of plywood rectangle toward the center to form a cone. Hold in place near the narrowest point with a rubber band.
Use a pencil to trace a line around the plywood, about 8 inches from the point. Remove rubber band, unroll plywood and cut along line.
Roll cone into place again and secure with a rubber band. The top of your cone should be relatively even, but don’t worry if it’s not—the moss will cover up any imperfections!
Cut down Oasis with box cutter and stick into bottom of cone.
Break off a piece of moss, an inch bigger in diameter than the top of the cone. Using adhesive spray, spray outside and inside of the top of the cone, as well as the underside of the moss. Adhere moss to cone.
Using an awl, punch a hole under the moss on opposite sides of the cone. Loop wire through hole and twist. Repeat on other side to make handle.
Arrange your flower in Oasis.
Tie ribbon over rubber band and attach the brooch to wire handle or moss.
HINTS & CLUES
- Cork works well as a substitute for the birch plywood.
- Be gentle with the plywood: if you’re having difficulty getting the plywood to stay in a cone shape, keep it rolled with rubber band for a few hours (or overnight) and it will be much more pliable.