Melon Layer Cake Recipe
During the warmer summer months, we find ourselves craving sweets that are a little lighter and more refreshing.
Though there’s nothing quite like Mile High Chocolate Cake when we’re craving sweets with substance to warm us up on the inside, the heavier cakes and pastries of the cooler months, simply don’t sit as well with us when it’s hot out.
The good news is, you can still have your cake and eat it too, even in the summer – the key is fruit!
Fruit based cakes are lighter, healthier and just so beautiful to behold, and the good news is, they’re just as tasty!

| Prep Time | 30 minutes |
| Servings |
people
|
Ingredients
- 1 Watermelon seedless
- 1 Cantaloup Melon
- 1 Honey Dew Melon
- 6 ounces Buttercream
- 12 ounces Whipped Cream or Whipped Topping
- 1 Large circle cutter
- 1 Small circle cutter
- 1 Chef’s knife
- Offset spatula
- Paper towels
- various Fruit to decorate
Ingredients
|

|
Instructions
- Slice 5 rounds of melon from the “fattest” part of the melons. You want two watermelon cross sections, and then two honey dew and one cantaloup (or if you like orange more than green, two cantaloup and one honey dew).
- Level the cross sections using your chef’s knife to make sure that when you stack them, they create a level tower.
- Using your large circle cutter (we used a vase, but you could use a cake round), punch the rounds so they are all the same size and without skin.
- Using the smaller circle cutter, punch out the centers of the seeded melons (honey dew and cantaloup). You will be left with 3 rings and two circles (watermelon).
- Pat the melon rounds with paper towel to remove excess moisture.
- Place one watermelon round on your cake plate. Top with a honey dew ring, then a cantaloup ring, alternating until all your are left with is the other watermelon round.
- Fill the cavity with whipped cream/topping.
- Top with remaining watermelon round.
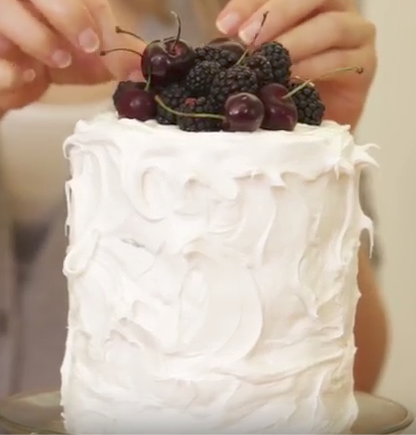
- Gently frost “cake” with buttercream using offset spatula. This requires a little patience, but once you have a thin layer established, it gets easier.
- Top with fruit to decorate.
Share this Recipe


Leave a Reply
Want to join the discussion?Feel free to contribute!